Mastering Portrait Lighting: The Butterfly Lighting Technique
Butterfly lighting is a technique that has been used by photographers for decades to capture beautiful, even light in portrait photography. It is one of the most popular lighting styles used in photography, particularly in beauty shots. In this article, we'll explore what butterfly lighting is, what you need to capture it, and the story behind this technique.
What is Butterfly Lighting?
Butterfly lighting is a technique where the light is positioned directly in front of the subject's face, creating a shadow under the nose that resembles the shape of a butterfly. This technique is also known as "Paramount Lighting" or "Glamour Lighting" and is widely used in beauty shots and fashion photography.
What is the Story of Butterfly Lighting?
The origins of butterfly lighting can be traced back to the Golden Age of Hollywood. It was widely used by Hollywood glamour photographers in the 1930s and 1940s to capture the beauty of Hollywood stars such as Greta Garbo and Marlene Dietrich.
One of the most famous photographers to use butterfly lighting was George Hurrell, who was known for his dramatic portraits of Hollywood stars. He used this technique to create stunning portraits of stars such as Joan Crawford and Bette Davis.
Over the years, butterfly lighting has become a staple technique in portrait photography. It is widely used in fashion and beauty photography and has become synonymous with glamour and sophistication.
What do you need to capture Butterfly Lighting?
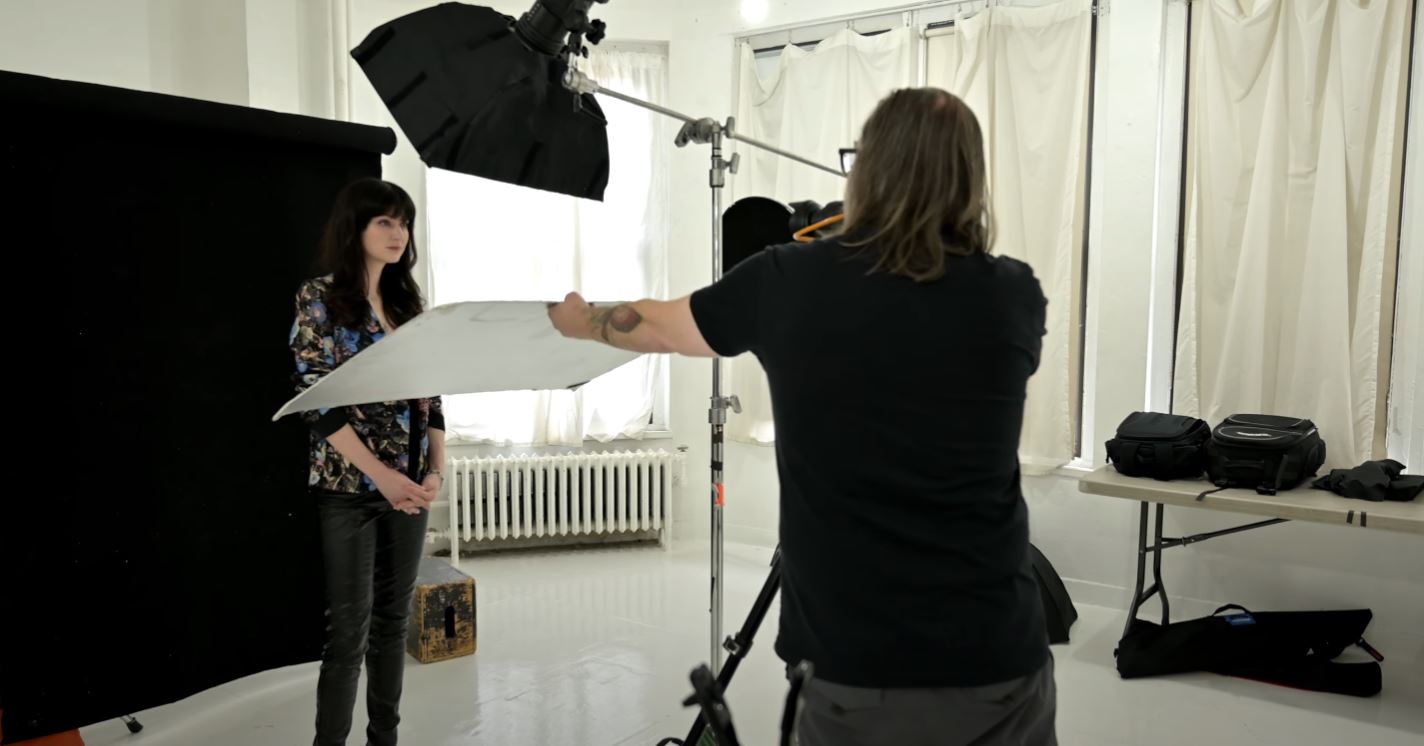
To achieve butterfly lighting, you'll need a light that you can boom out. A boom is a long arm that attaches to your light stand and allows you to position the light in front of the subject. You'll want to position the light relatively close to the subject's face, about a foot or so away to start, and up to three feet depending on the subject's face shape and the size of your modifier.
The closer the light is to the subject, the more defined the butterfly shape becomes - said Daniel Norton-
Once you have the light positioned correctly, you can take a test shot to see how it looks. The resulting image should have a beautiful even light across the face, with the butterfly shape under the nose and a defined jawline.
One advantage of using reflectors is the ability to adjust them to create beautiful catchlights in the subject's eyes.
What do you need to capture butterfly lighting?
- Camera: Any camera with manual controls will work for this type of lighting. Ideally, you want a camera with a large sensor and good low-light performance. Some popular options are the Canon EOS R6, Nikon Z6 II, or Sony A7 III.
- Lens: The best lens for butterfly lighting depends on your specific needs and budget. A popular choice is a prime lens with a focal length between 50mm and 85mm. The Canon EF 85mm f/1.8 USM, Nikon AF-S NIKKOR 85mm f/1.8G, and Sony FE 85mm f/1.8 are all excellent choices.
- Lighting Equipment: To achieve butterfly lighting, a softbox or umbrella is necessary to diffuse the light and create soft shadows. The size of the softbox or umbrella will vary based on the size of the subject and the amount of available space. A popular choice is a 24-inch or 36-inch softbox. You will also need a light stand to mount your light, such as the Manfrotto 5001B Nano.
- Light Source and Trigger: For the light source, you can use either a studio strobe or a speedlight. A studio strobe provides more power and consistent lighting, while a speedlight is more portable and easier to use on location. Some popular studio strobe options are the Paul C. Buff AlienBees or the Godox AD400Pro. For speedlights, the Canon Speedlite 600EX II-RT, the Nikon SB-5000 or the Godox TT600 are excellent options.
- Reflector: You will also need a reflector to fill in the shadows created by the light. A 5-in-1 reflector with a silver side is a good choice as it will bounce back a lot of light and create a bright, contrasty effect.
Butterfly lighting is a great technique for beauty shots, as it helps define the face and creates a flattering, even light.
You may also like: Light Placement for Portraits by Daniel Norton


0 comments:
Post a Comment